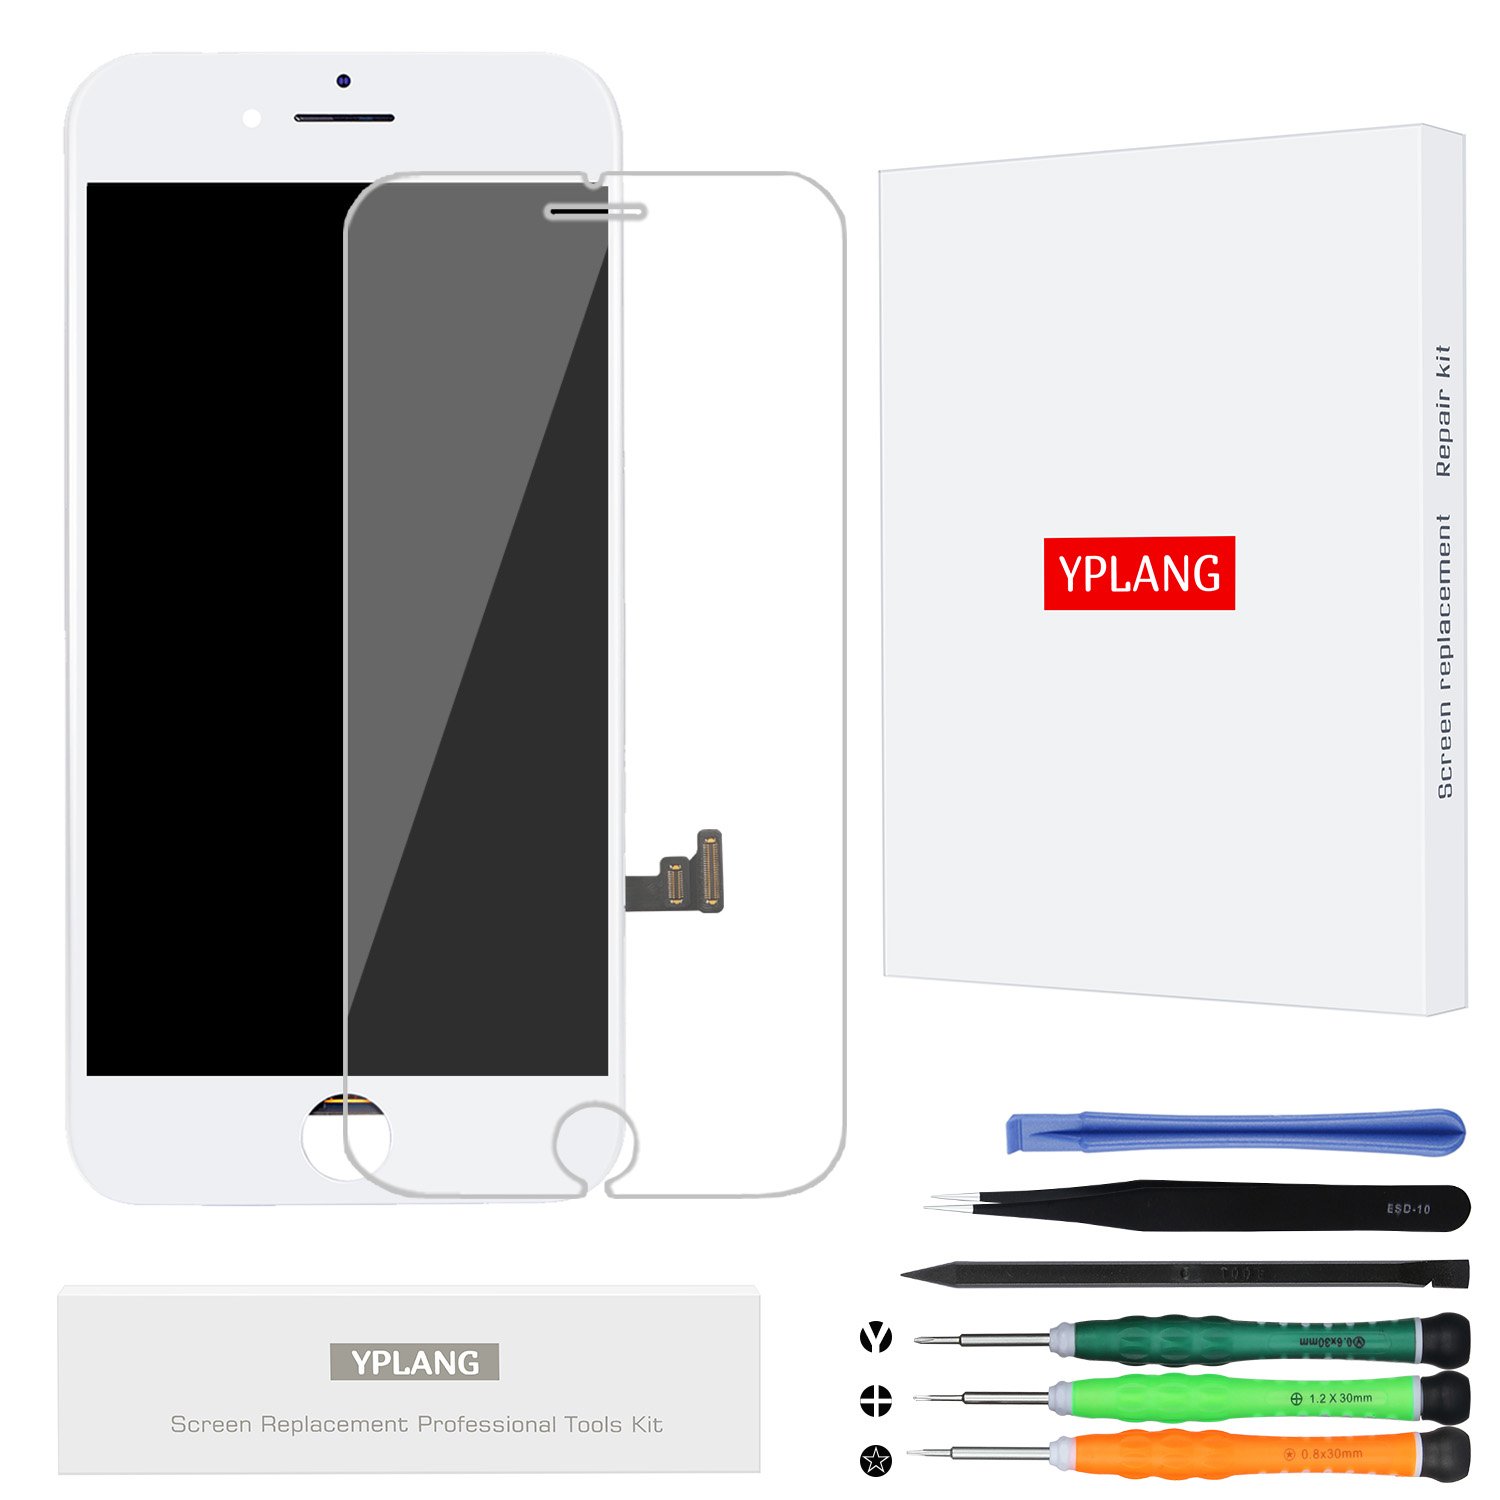
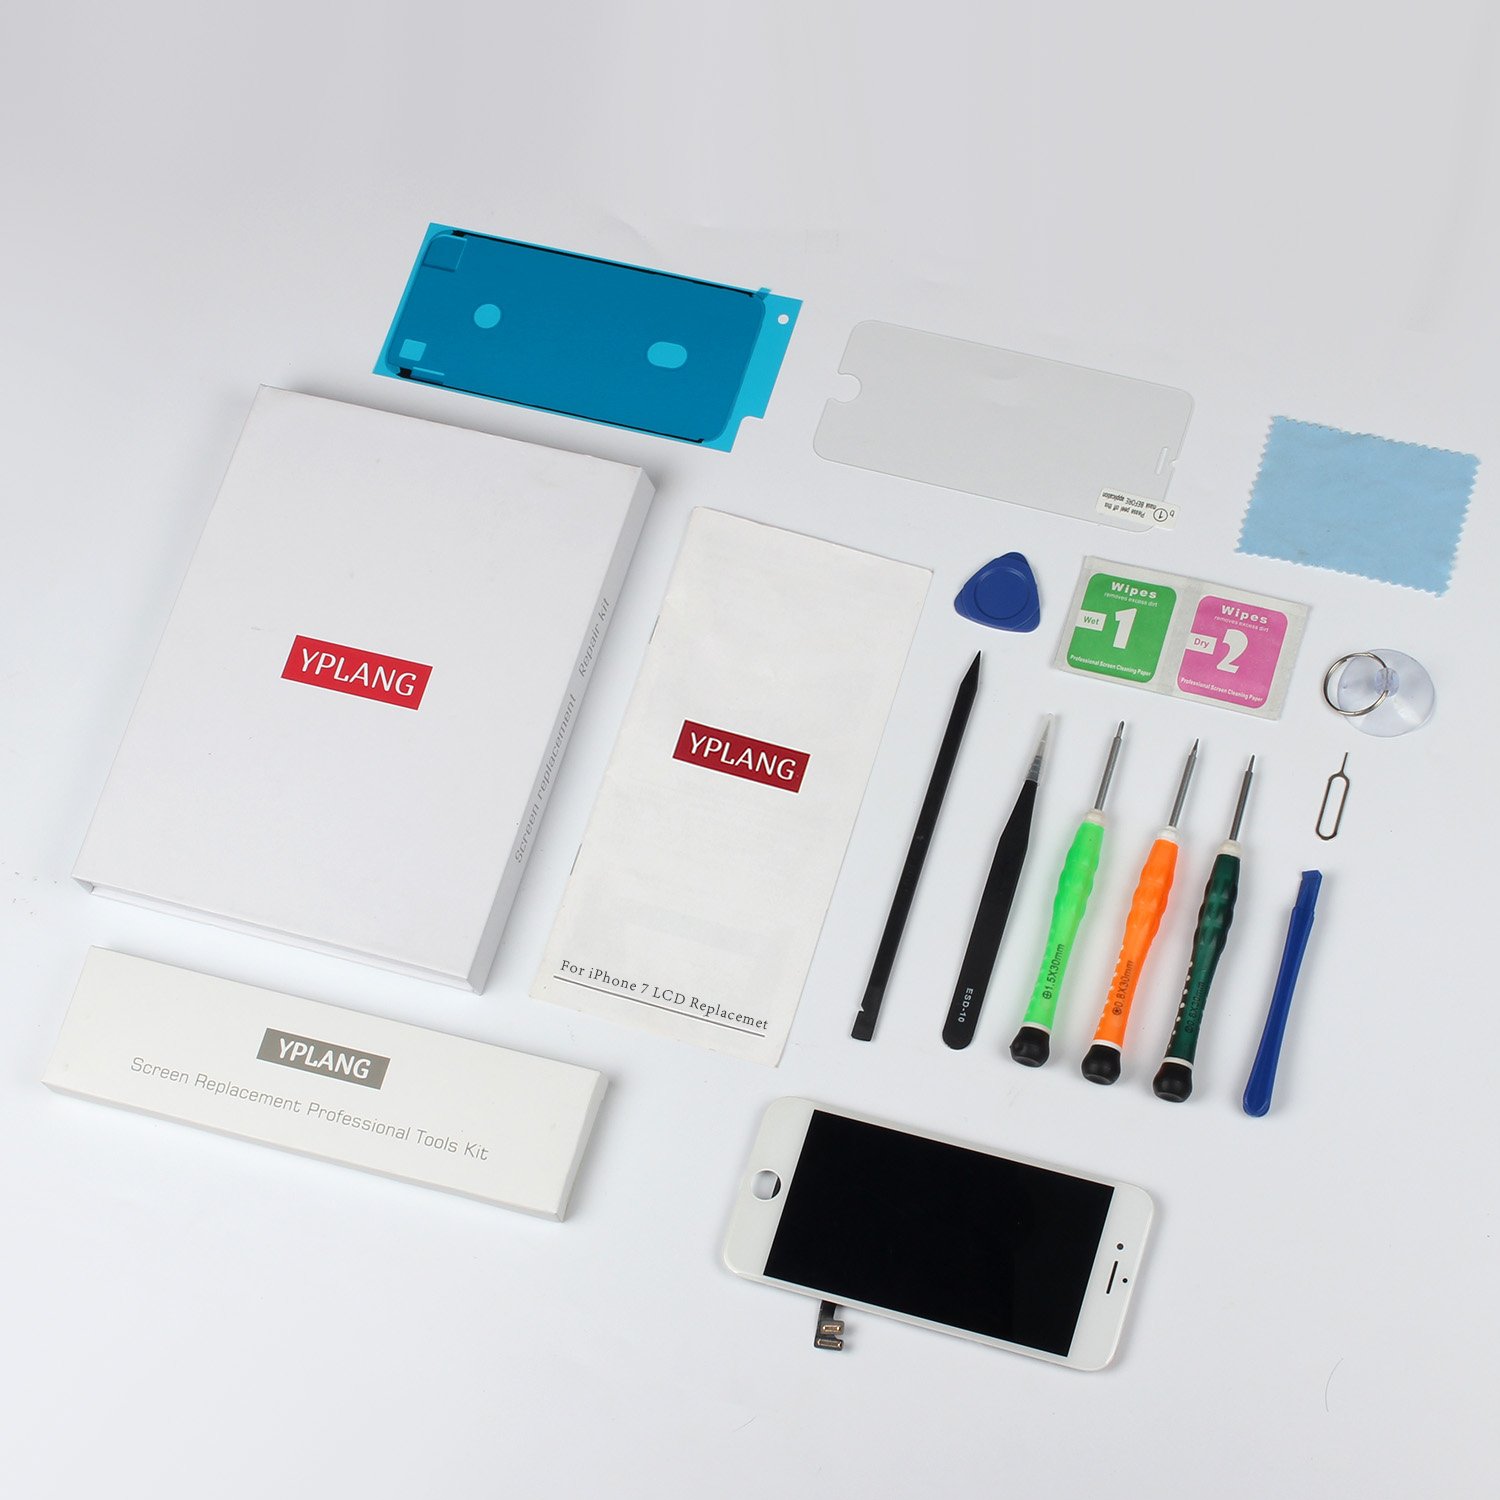
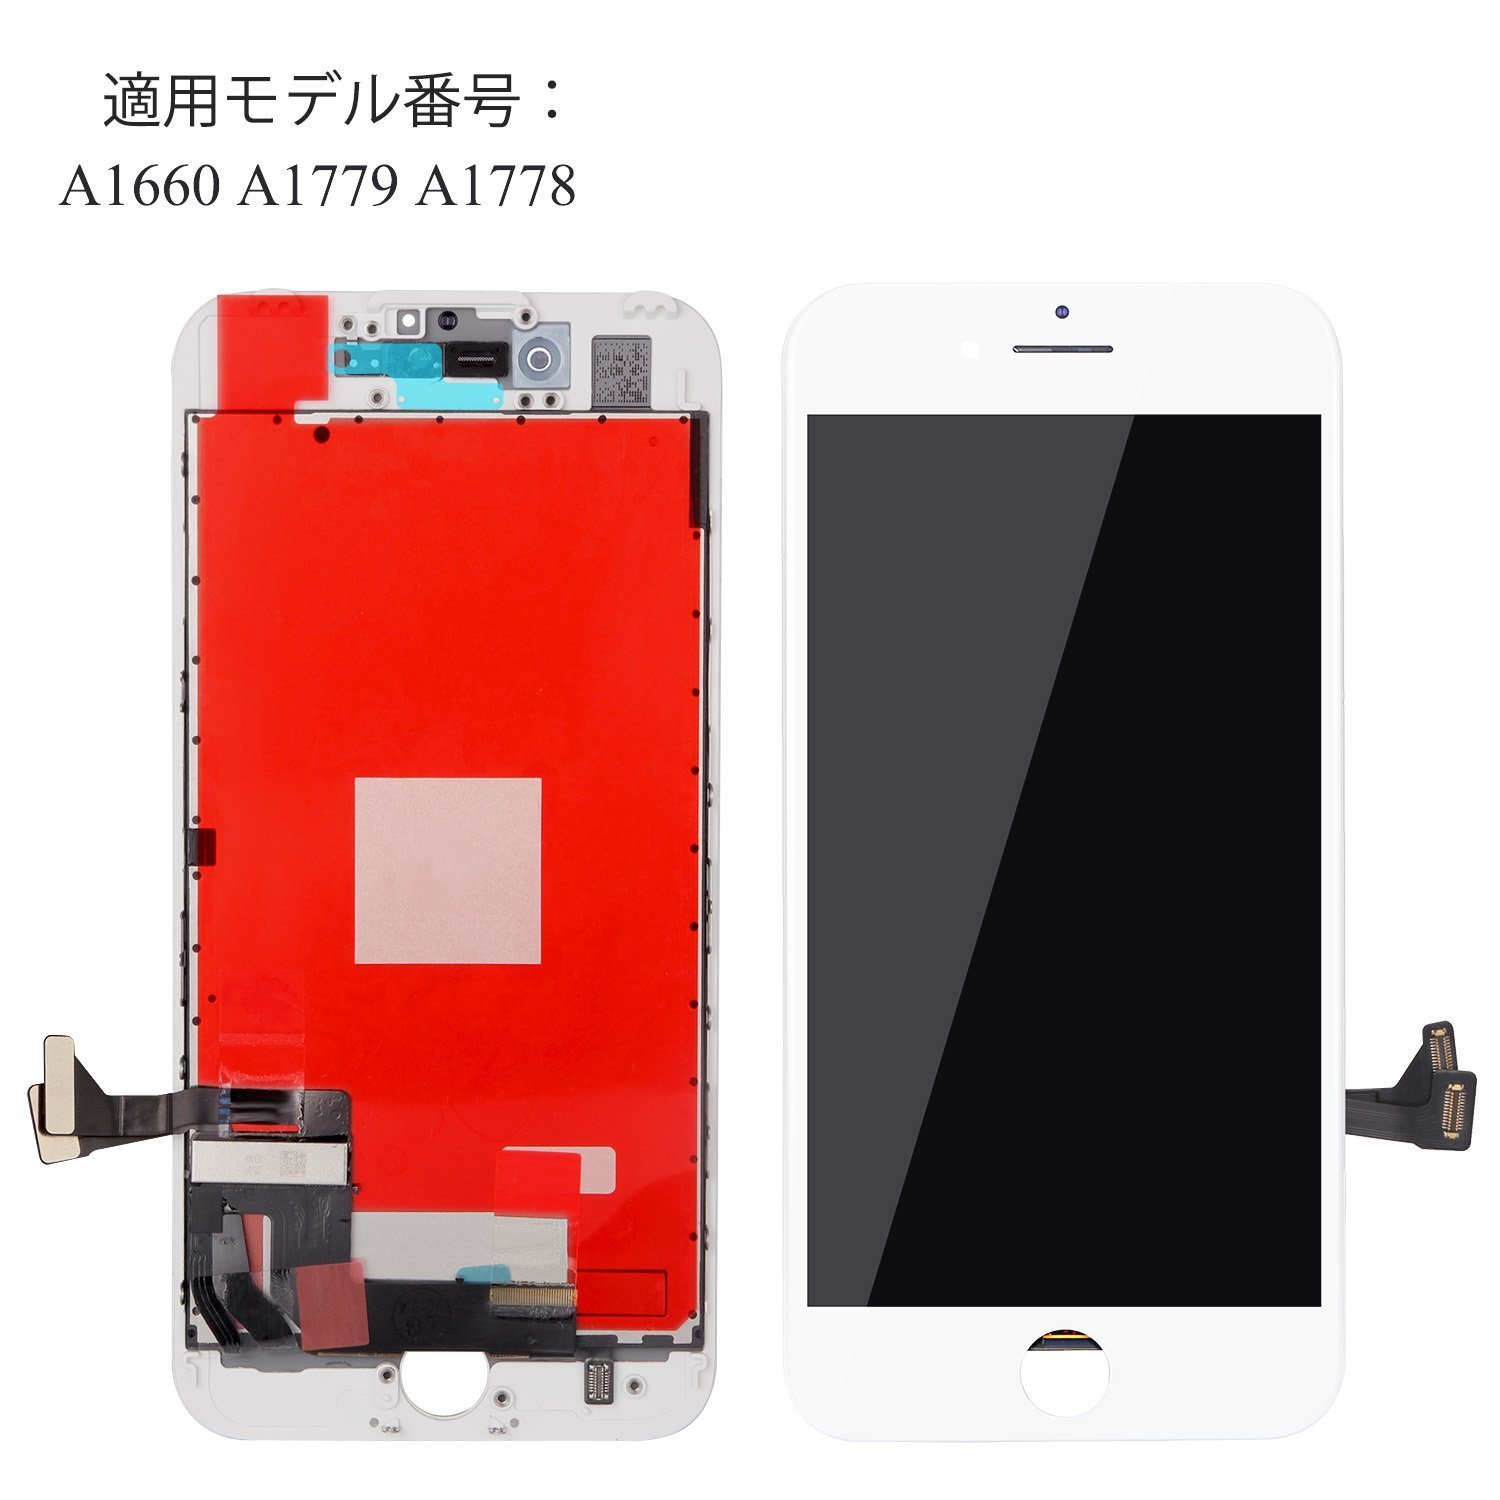
Item Descriptions:
step 1:
First turn off the power.
Remove the screws on both sides of the main unit's bottom Lightning connector.
A dedicated driver is required because of the special shaped screw called penta lobe (star).
Step 2:
Pull the suction cup to the front button side of the front panel and pull slowly to open the front panel.
If the panel is tightly fitted, at the stage where a slight gap is formed between the panel and the case, inserting a plastic spatger or the like makes it easy to open it.
Caution:
Since many connectors on the right side of the liquid crystal are connected, do not pry on the right side with a spatger.
Notes on opening the main unit:
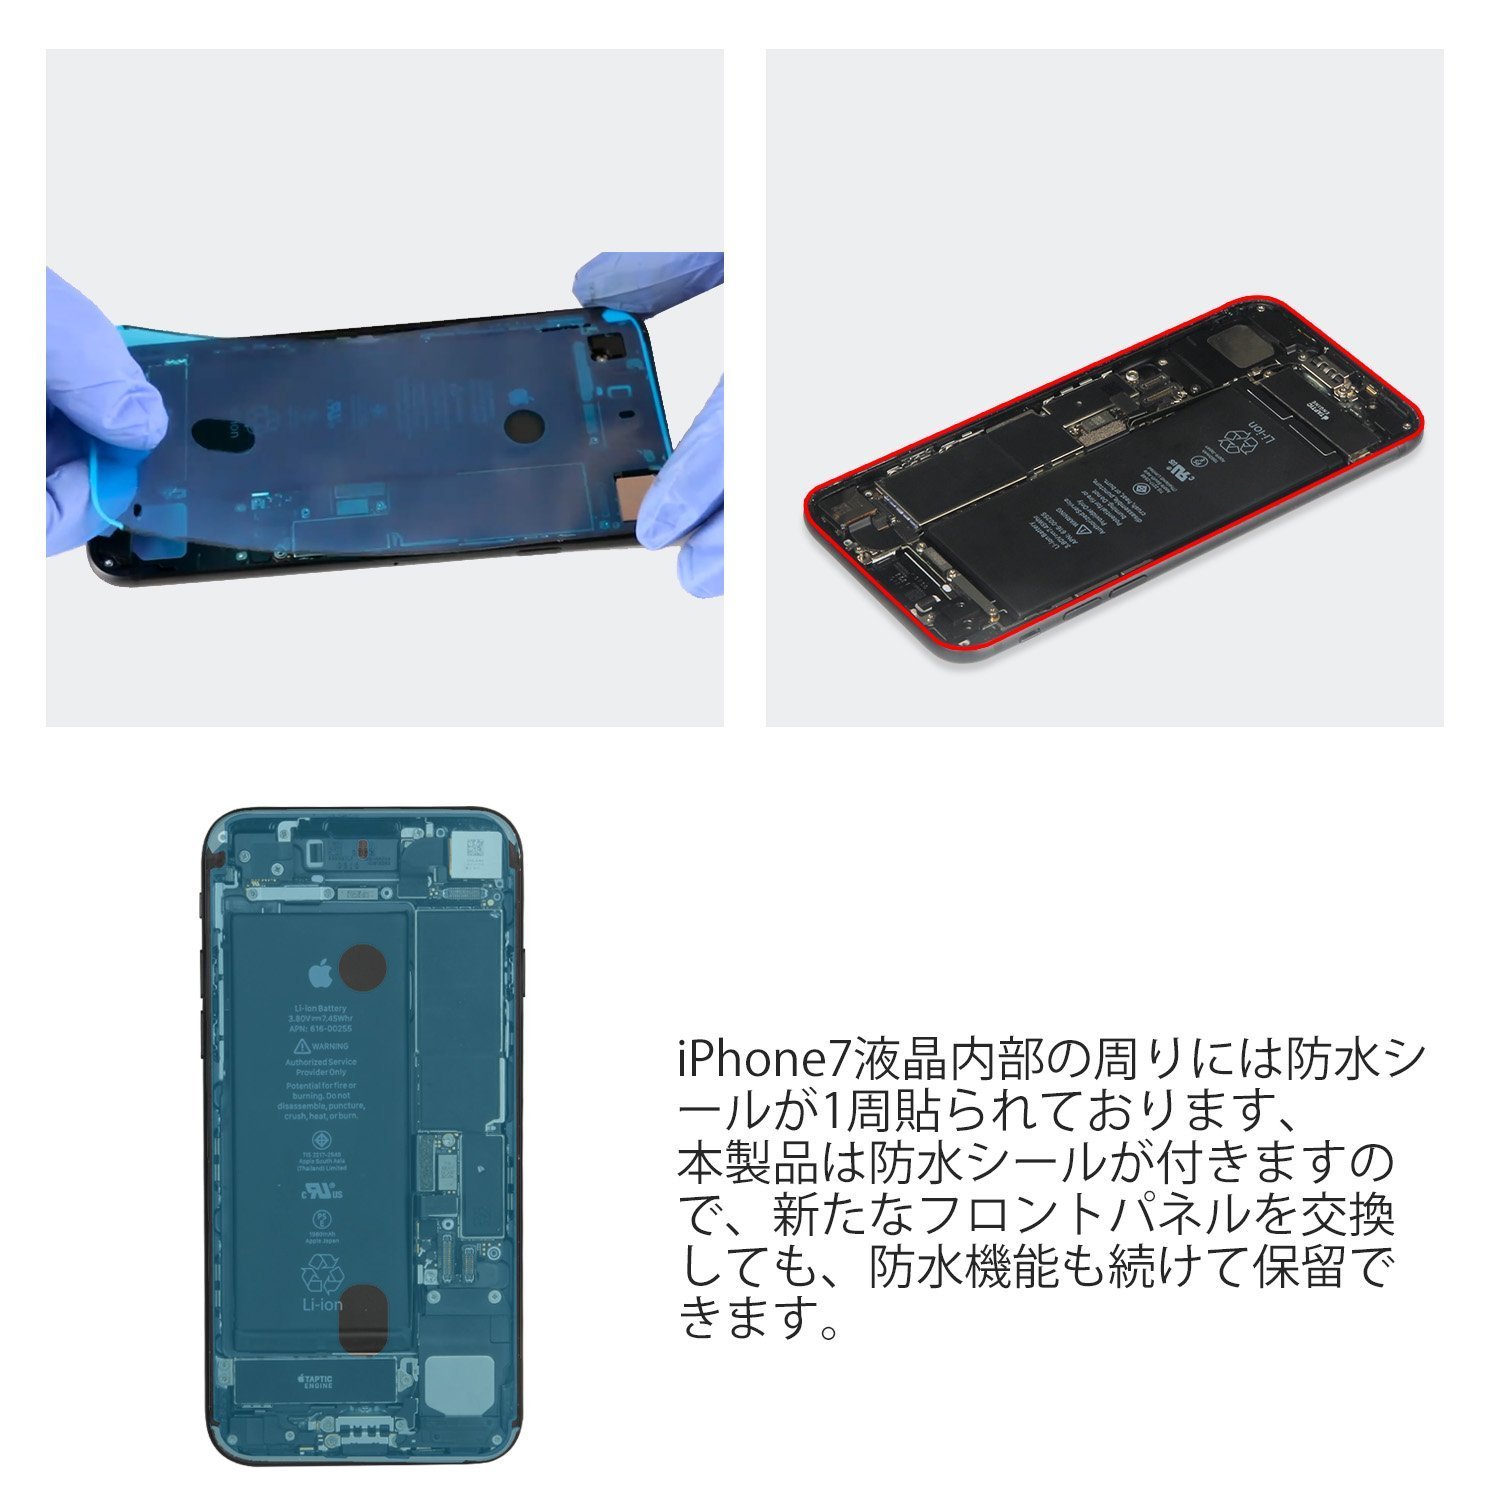
iPhone 7 Around the inside of the liquid crystal, a waterproof seal is affixed a whole lap. It is a little hard, if it puts out force forcefully it will cause it to break down, so it is about 1 or 2 minutes towards the edge of the main body with a hair dryer
Although it was easy to peel off when it was applied after a little heat was applied, it was able to be opened but please be careful not to break it because many connectors of the liquid crystal side are connected to the logic board.
Step 3:
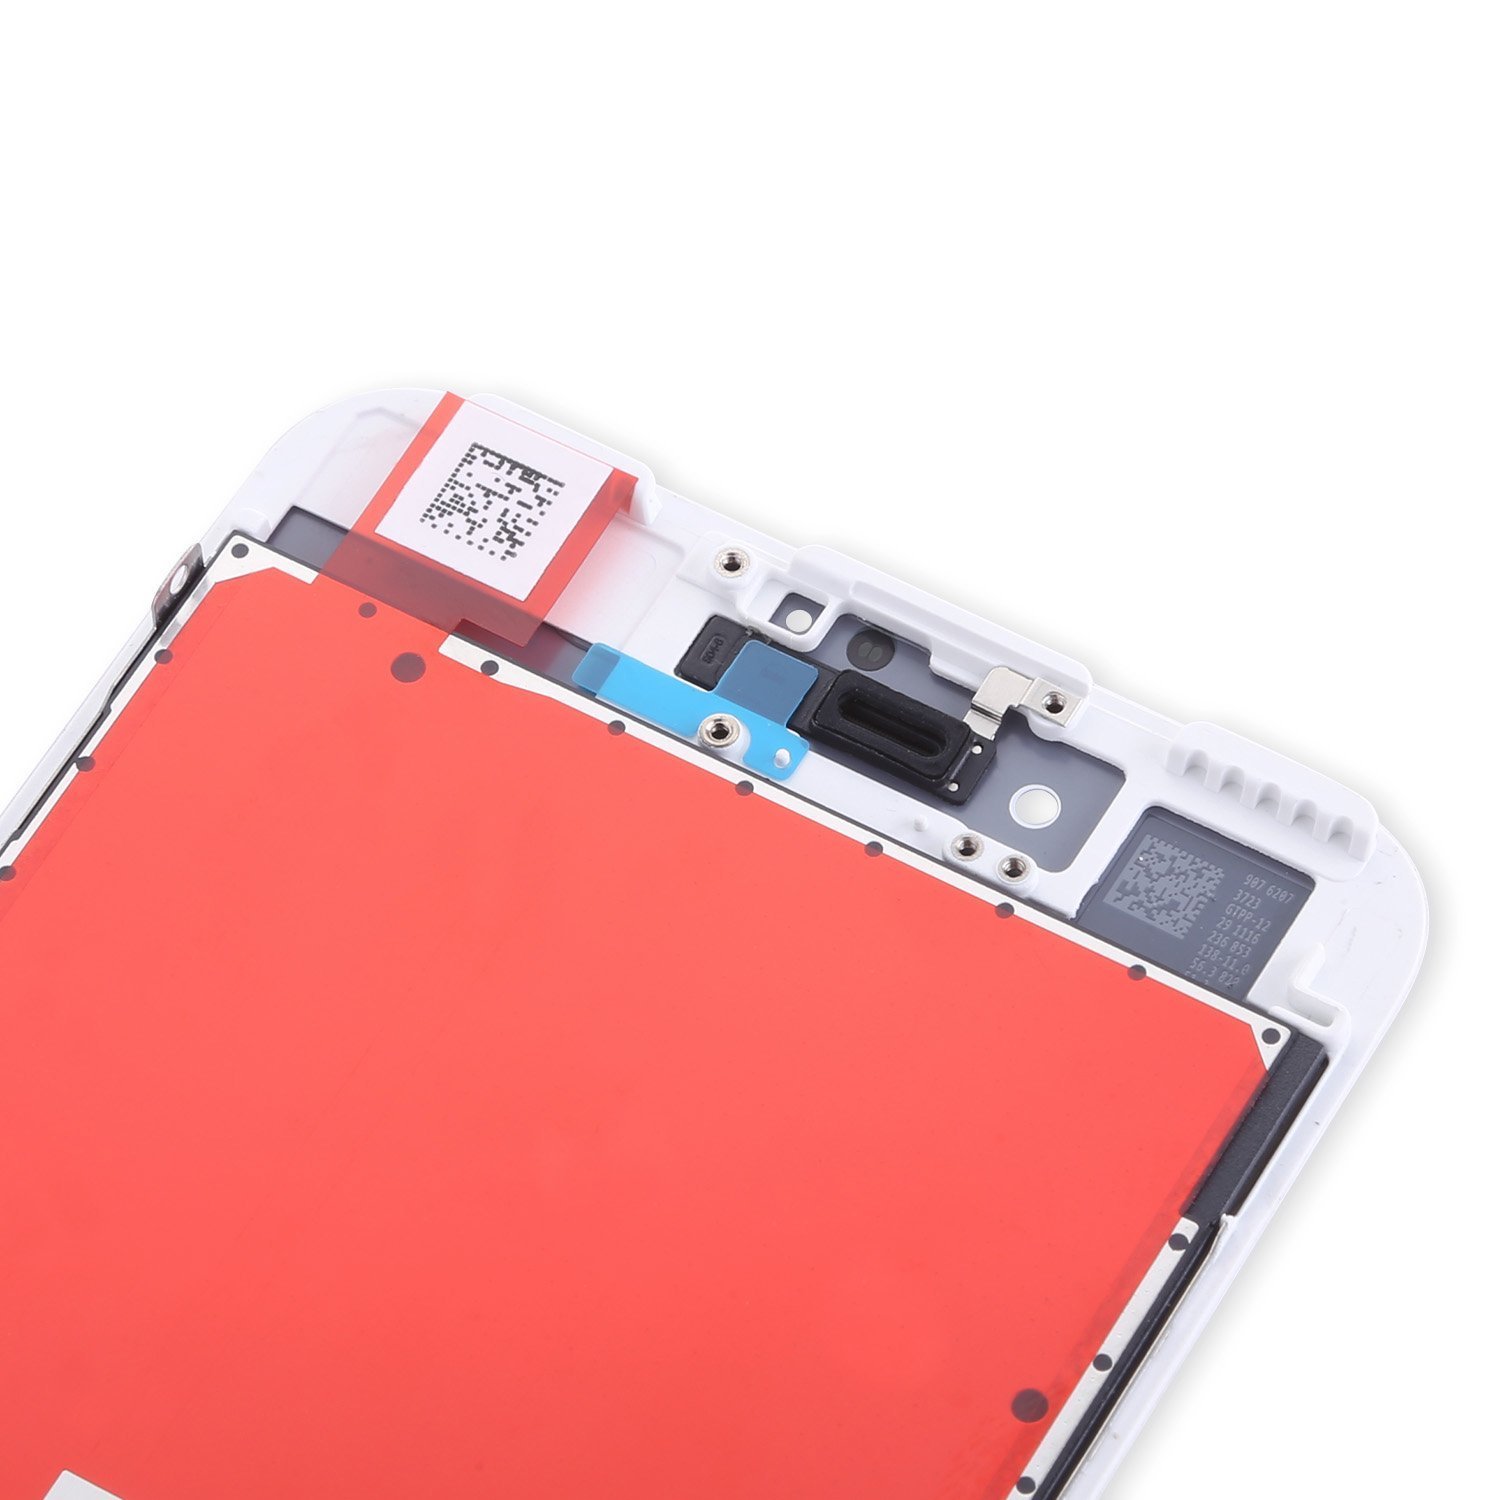
Remove the screw that holds the LCD screen, the fixing plate of the cable connecting the digitizer and the logic board.
(Caution: Be sure to note the screw position as the screws here are different in size depending on the location.)
Step 4:
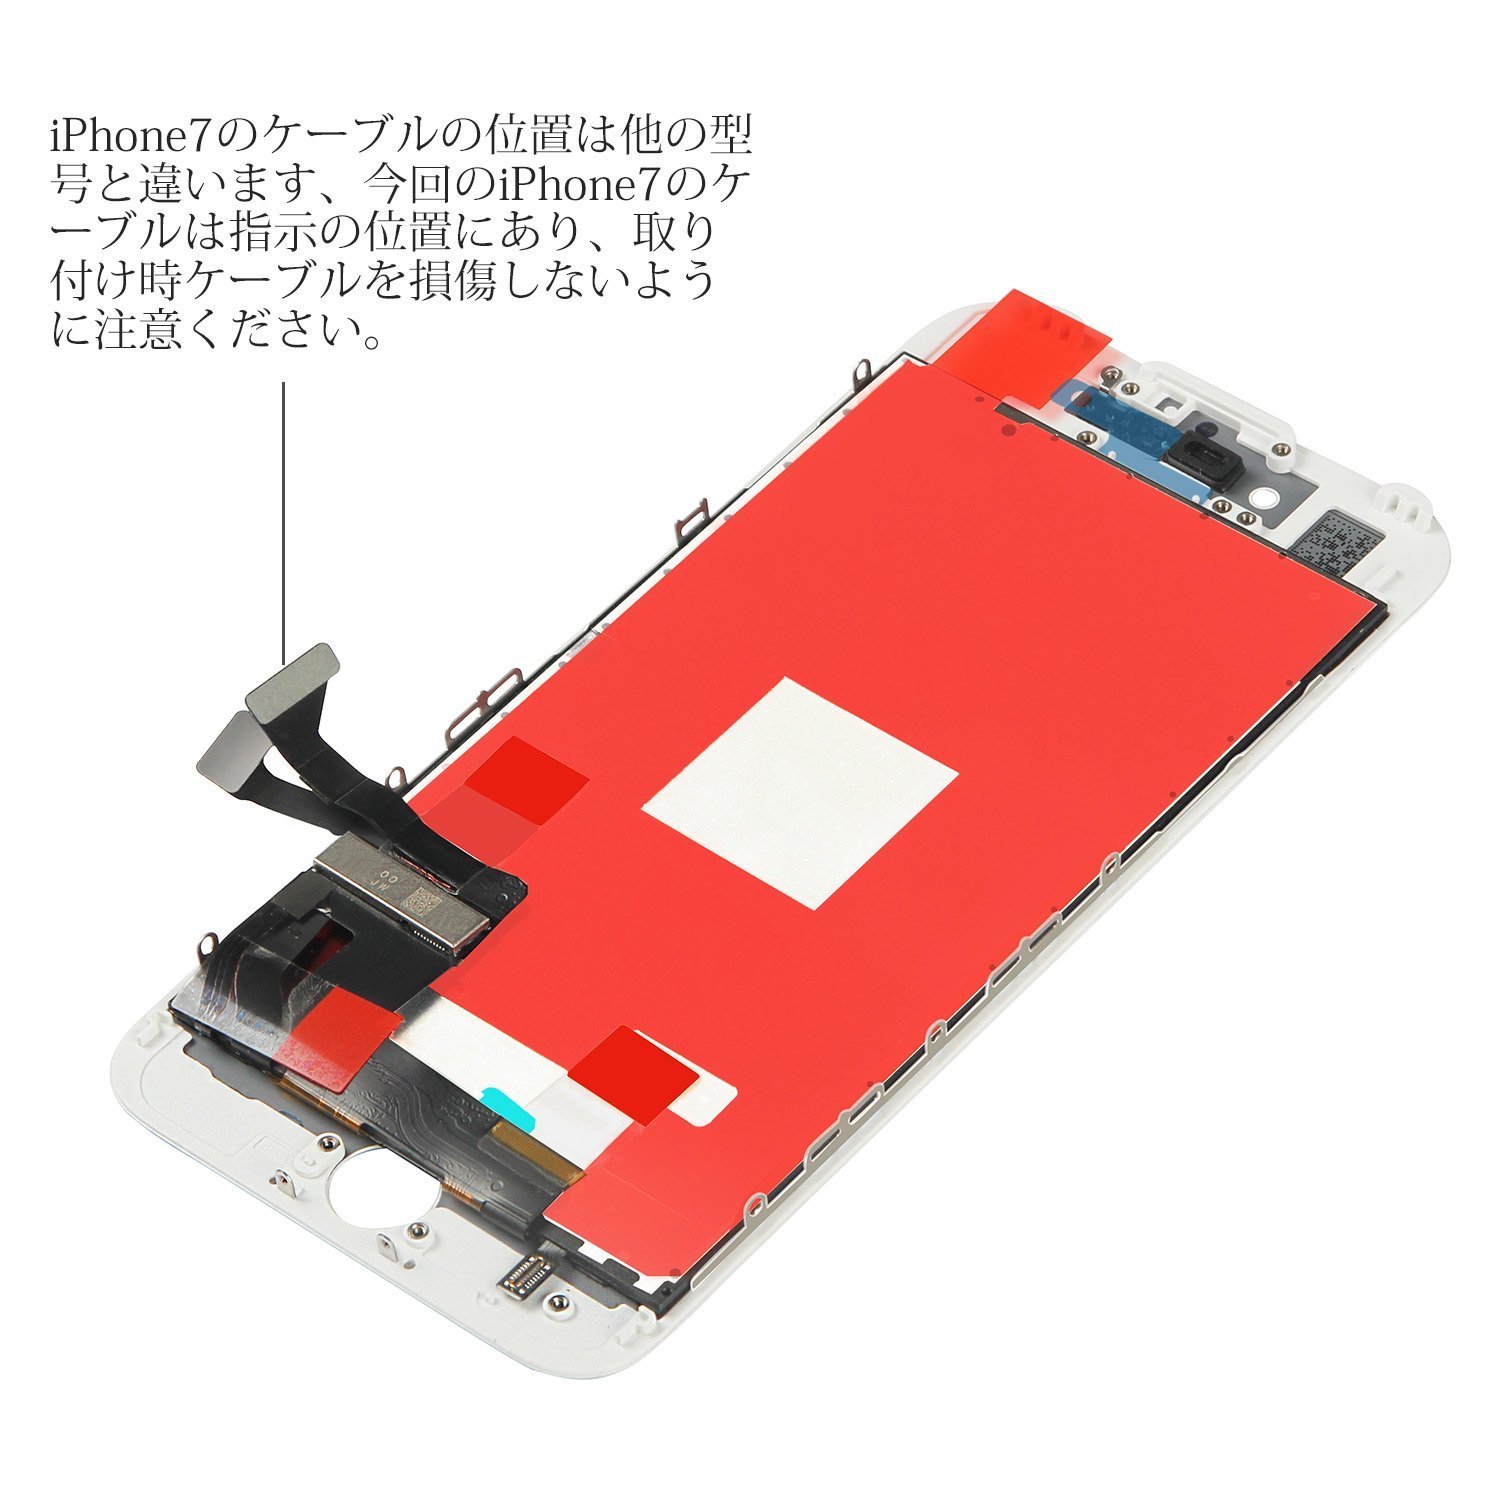
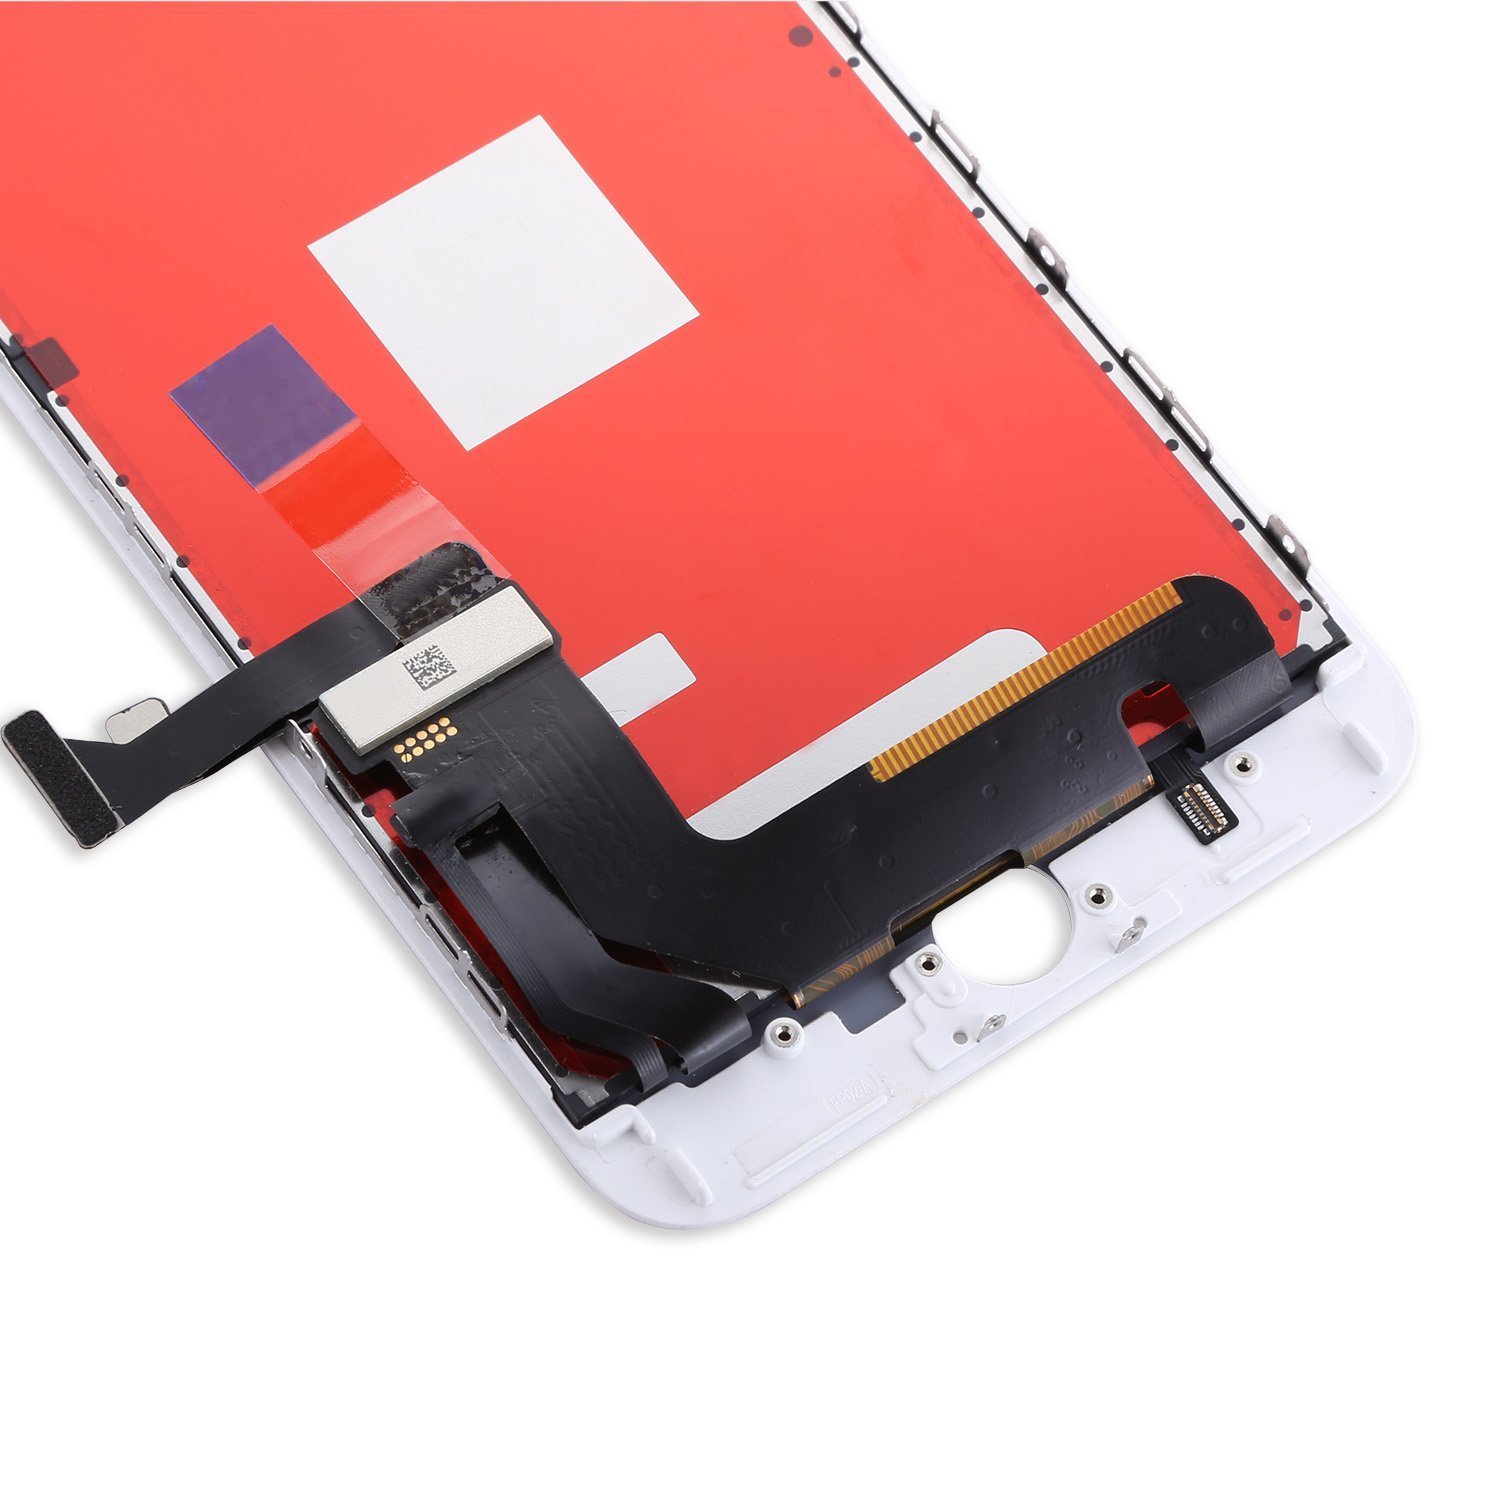
Remove the cables connecting the LCD screen, digitizer, front camera, etc. to the logic board in order.
Remove it by raising the connector part with a plastic spatger or the like as shown in the photo on the right.
In case
Step 5:
Remove the screw that holds the fixing board of the cable connecting the front camera and the logic board, remove the fixing plate when the screw is removed, then detach the cable connecting the front camera and the logic board later
I will.
I was able to separate it on the body side of the iPhone 7 and the liquid crystal side with this.
please note:
1, Do not bend when connecting so as not to damage the cable;
2, Please be sure to note the original position of the screw because the size of the red circle part is different depending on the place; (Note: If you use a long screw at the short screw place the circuit may short-circuit
Let's be careful (because there is a circuit under the screw hole);
3, Do not press the inside of the screen strongly even when removing the liquid crystal panel, even when installing, please proceed carefully as it is easy to break.
Features:
Product information:
Shipping Weight: 222 g
Package Dimensions: 1.80 x 15.19 x 20.09 cm
SHIPPING METHOD
Delivered directly from Japan by Japan Post. It will take 3 to 5 business days to prepare the order for shipping. We guarantee careful packing and safe shipping.Please note that in some cases additional import or VAT charges may incur and have to be borne by the client.
1. Japanpost registered mail
Shipment by Japanpost Registered Mail (Standard). Trackable any time with tracking number. Insurance is not available. Delivery time usually is between 1-3 weeks from the date of dispatch. Some items are not eligible for Standard Shipping.
2. Qxpress Standard
Shipment by Qxpress standard service. Trackable at any time with tracking number. Registered and insured up to a value of item price and shipping fees.Delivery time is usually between 5-10 business days from the date of dispatch.
3. EMS
Shipment by Expedited Mail Service. Trackable at any time with tracking number. Registered and insured up to a value of $200 and usually delivered in 2-6 business day from the date of dispatch.

| Japanpost registered mail | Qexpress | EMS | |
|---|---|---|---|
| Shipping Method | Japanpost Registered Mail (Standard) | Standard Qexpress | EMS (Expedited Mail Service) |
| Trackable | Yes | Yes | Yes |
| Insured | N/A | Yes (Up to item price and shipping fees) | Yes (Up to $200.00) |
| Asia | 1-3 weeks | 5-10 days | 2-5 days |
| Oceania; North America; Central America and the Middle East | 2-4 weeks | 6-14 days | 2-6 days |
| Europe | 2-4 weeks | 6-16 days | 3-8 days |
| South America and Africa | 2-4 weeks | 10-18 days | 4-8 days |
NOTICE:
"According to Qoo10 guide line,overseas shipping fees will be charged to you extra if you choose Qxpress standard shipping.We recommend you to compare the total price of your purchase with EMS."
