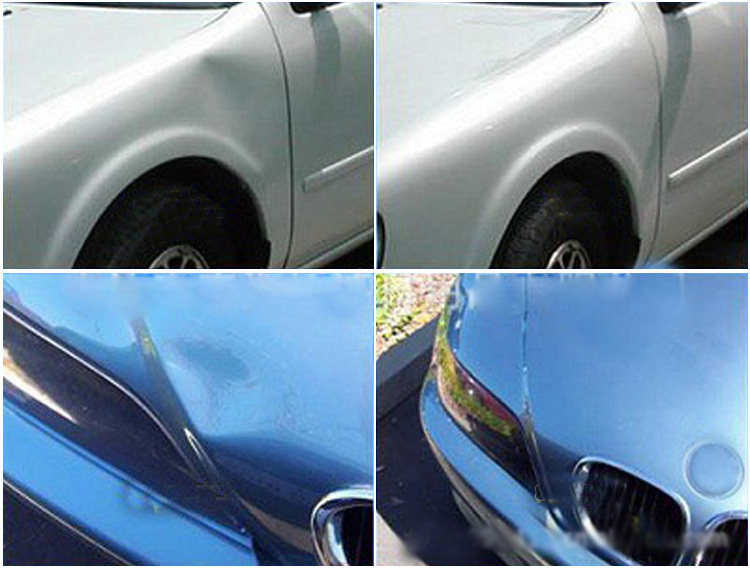
◆ Free paint depression repair, do not destroy the original paint, fast and save money and environmental protection.
◆ Three different size traction pads, suitable for all sizes of dimples.
◆ Suitable for automotive surface sheet metal, refrigerator, washing machine surface sheet metal.


◆ suitable for a variety of flat metal concave place to use.
The product contains a glue gun, three sticky chain, a nut, a stent, a plastic stick. (Glue stick can be added)
1, with a clean damp cloth to clean the dent part;
2, the hot melt adhesive stick from the back of the hot melt glue gun into the trigger pull the glue stick into the glue gun, plug in the power, so glue gun preheated for 5 minutes;
3, to find a suitable traction pads (large dents need to use a large traction pad; (Note: The traction pad larger pull the traction will be greater);
4, trigger the glue gun, coated with a plastic squeeze out the choice of traction pads (gasket 4 holes should also be coated with hot melt adhesive
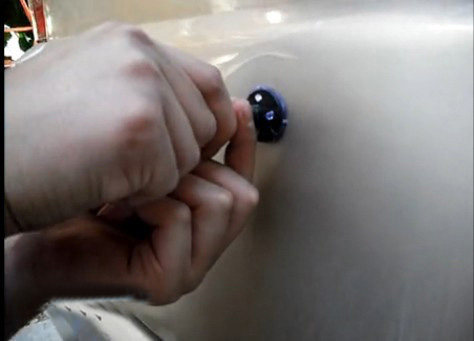
 5, quickly pull the traction pad coated with hot melt adhesive in the central part of the dent, gently pressed until the hot melt adhesive firm; (let the hot melt adhesive to dry for about 8 minutes; we recommend not to let the heat Do not melt more than 10 minutes dry time)
6, pull the middle of the traction bridge tensioning the hole in the traction pad gasket stick, the screw rotation knob sleeve in the traction pad lever, slowly tighten until the dent part pulled flush with the surrounding surface can be .
7, some dents, may need to repeat the above steps a few times before the dent can be repaired.
8. If the repaired surface protrudes a bit, follow the steps below: First, rub the raised point back and forth with your thumb until the raised point is as flat as the other surfaces; if the raised point can not be flattened with your thumb, use Tap the stick (hold the pen's position) Gently click on the convex point, until the convex point to restore the formation. Sometimes, it may take several times to repeat. (Note: When using the percussion stick, not too much force)
9, dent repair, unscrew the screw rotation button, remove the traction pull bridge, and then remove the traction pad, if there is hot melt adhesive in the body surface, gently tear the hands can be.

1、用干净的湿布清洁凹痕部分;

2、把热熔胶棒从热熔胶枪后面装入,扣动扳机,让胶棒进入胶枪,插上电源,让胶枪预热5分钟;
3、找一个合适的牵引垫片(大的凹痕需要用大的牵引垫片;(注意:牵引垫片越大,牵引的拉力也就越大);
4、扣动胶枪扳机,用挤出的胶涂满选择的牵引垫片(垫片的4个孔也要涂满热熔胶);(下图1)
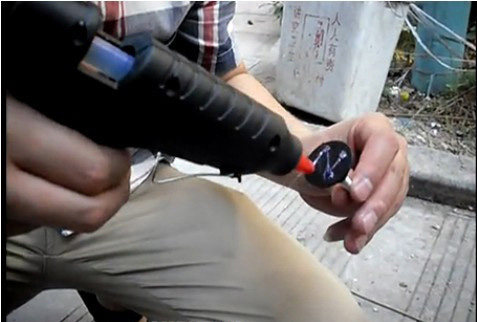
5、快速将涂满热熔胶的牵引垫片放在凹痕的中央部位,轻轻压住,直至热熔胶固化粘牢;(让热熔胶晾干大约3分钟;冬季晾干的时间稍微短一些。)(下图2)
6、把牵引拉力桥中间的孔对准粘牢的牵引垫片杆,把螺母旋钮套在牵引垫片杆,慢慢旋紧,直到把凹痕部分拉到同周围的表面齐平即可;(下图3) 
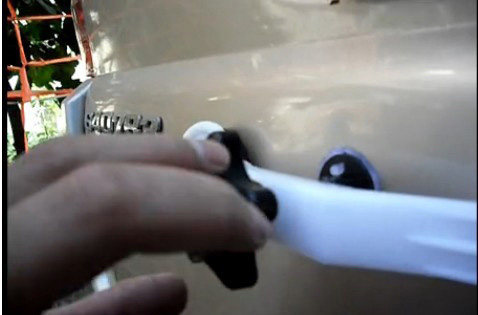
7、有些凹痕,可能需要重复上述步骤几次,才能把凹痕修复;
8、如 果被修复的表面凸起了一点,请按照下面的步骤操作:首先用大拇指来回摩擦凸起点直到凸起点跟其他表面一样平;如果用大拇指不能让凸起点恢复平整,就要用 敲击棒(握笔的姿势)轻轻地点击凸起点,直至凸起点恢复平整。有时候,可能需要重复几次才可以。(注意:使用敲击棒时,不可用力太大)
9、凹痕修复后,旋下螺母旋钮,取下牵引拉力桥,再取下牵引垫片,如果有热熔胶粘在车体表面,让手轻轻撕掉即可。