Specification
NEW and PRACTICAL----Digital Portable Scanner
Scanning resolutions:300/600/900 DPI
Supports MicroSD card of up to 32GB
2X AA batteries
Driver free to download for MS Windows 7/Vista/XP and MacOS10.4 or above
(direct plug-in,driver installation not required)
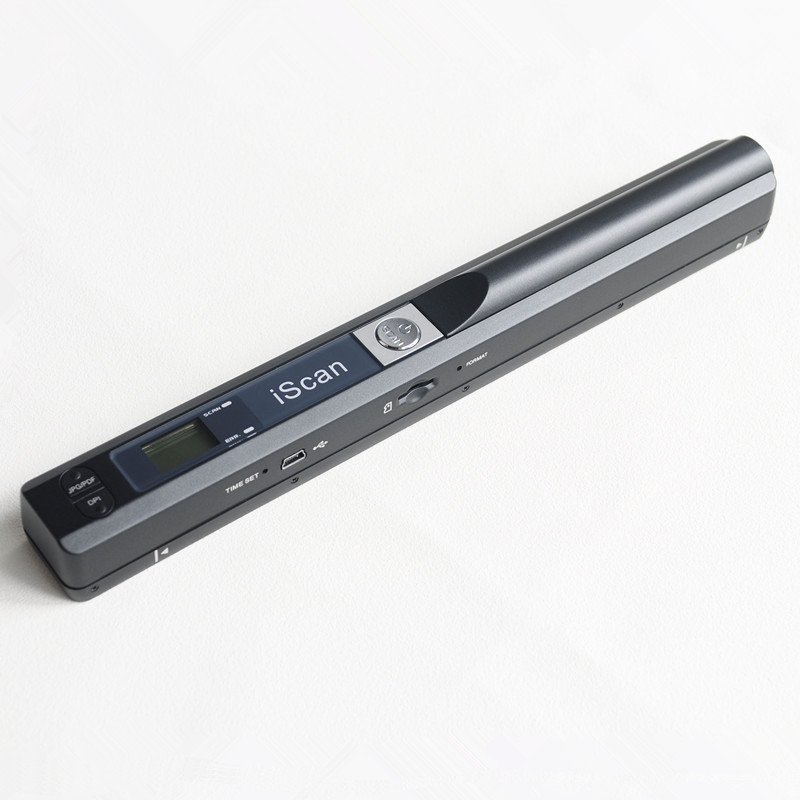
Component:
component function
1 Time set Button Press this button to enter time set mode
2 USB 2.0 high Speed
3 MicroSD Card storage
4 Format Button Press this button to format Micro SD card
5 Storage formats Choose Storage formats. LCD will display JPG/PDF
6 Scanning LED indicator Scanning ready:LED indicator light is green
7 Power/Scanning Power on/off: hold down this button 2 seconds ,then open
power or shut off the power.After open the power, push down this button to
scan Then press this button to stop the scanning
8 Power source 2 x AA batteries High/Mi/Low Resolution Mode Icon will display on LCD.
9 Resolution 900DPI/600DPI/300DPI
10 LCD Scanning status display
11 Correct LED indicator When over-speed,LED indicator light is red
1. Specification
NEW and PRACTICAL----Digital Portable Scanner
Scanning resolutions:300/600/900 DPI
Supports MicroSD card of up to 32GB
2X AA batteries
Driver free to download for MS Windows 7/Vista/XP and MacOS10.4 or above (direct plug-in,driver installation not required)
2. Component:
|
|
component |
function |
|
1 |
Time set |
Press this button to enter time set mode |
|
2 |
USB port |
Port USB 2.0 high Speed |
|
3 |
SD Card |
MicroSD Card storage |
|
4 |
Format Button |
Press this button to format Micro SD card |
|
5 |
Storage formats |
Choose Storage formats LCD will display JPG/PDF |
|
6 |
Scanning LED indicator |
Scanning ready:LED indicator light is green |
|
7 |
Power/Scanning |
Power on/off: hold down this button 2 seconds ,then open power or shut off the power After open the power, push down this button to scan Then press this button to stop the scanning |
|
8 |
Power source |
2 x AA batteries |
|
9 |
Resolution |
900DPI/600DPI/300DPI High/Mi/Low Resolution Mode Icon will display on LCD. |
|
10 |
LCD |
Scanning status display |
|
11 |
Correct LED indicator |
When over-speed: LED indicator light is red |
3. Status Icons:

 Photos will be stored in Micro SD card
 Power adequate;
 Battery low;
3. How to use this scanner
3.1 Open battery door
1.Open battery door
2.Put 2 AA Alkaline batteries in the battery box
3. hold down the power/scanning button 2 seconds to turn on
3.2 Insert MicroSD Card
You must insert MicroSD Card to record and save images.
3.3 Time Set
1.press TIMIE SET button to time set mode.
2.1×× display on LCD ,pressing C/WB&DPI button to adjustment
3.Press SCAN button to confirm time set.
4.Jump to next mode settings on LCD,see below:
1×× Setting year
2×× Setting month
3×× Setting the date
4×× Setting hours
5×× Setting minutes
5. After set all information,press TIME SET to exit
3.4 format MicroSD card
1.insert a new MicroSD card into scanner,then open the scanner.
2.Press the button of format,LCD will display "F"
3.Press power/scanning button will format MicroSD card.
4.SD card indicator will flashing till finish format MicroSD card.
3.5 Set Resolution:
Press DPI button to choose High resolution/Middle resolution/Low resolution
High resolution/Middle resolution/Low resolution icon will display on LCD.
3.6 Set scanning color mode
Press C/BW button,choose JPG/PDF format..
JPG/PDF mode icon will display on LCD,
3.7 How to scanning

Scanning by one hand,
Putting the right position on the scanning objects.
Hold the scanner,and press the SCAN to scanning.
Moving slowing, the scanner and your hand must remain stable to gain the image of high quality.
Press power/scanning to stop scanning.
LED light instructions

4. Specification


Minimum requirement of PC system


